QT-PyQt-PySide-Custom-Widgets - QT Cards(QCards)
Install the custom widgets
pip install QT-PyQt-PySide-Custom-Widgets
QT Cards Widget
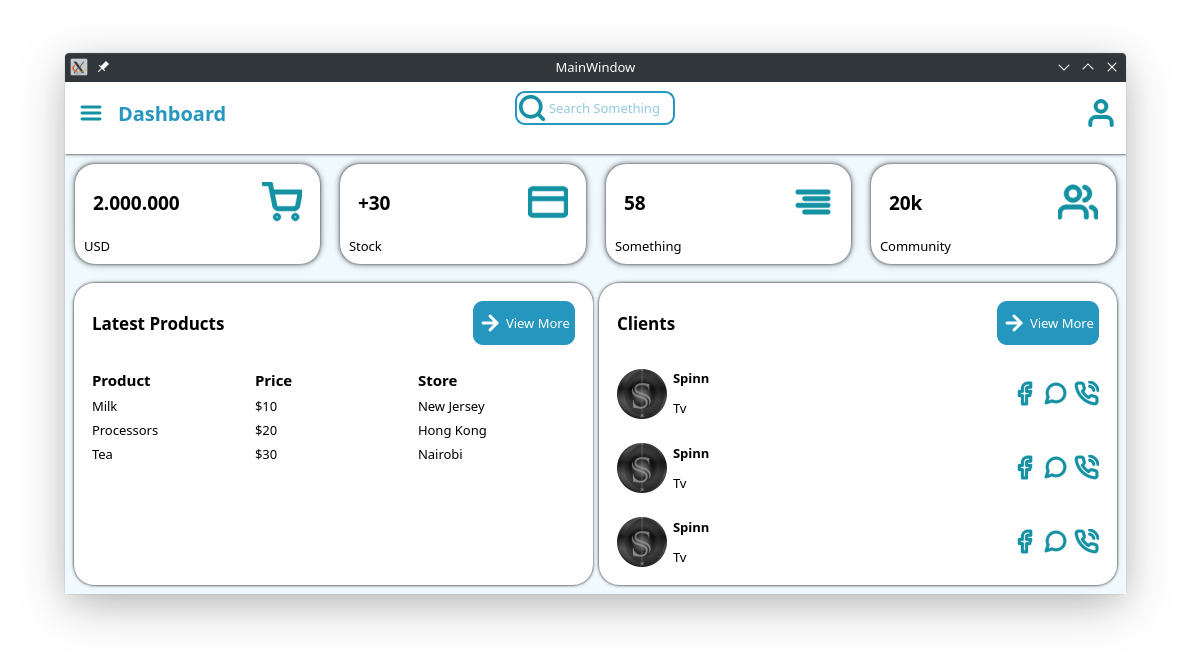
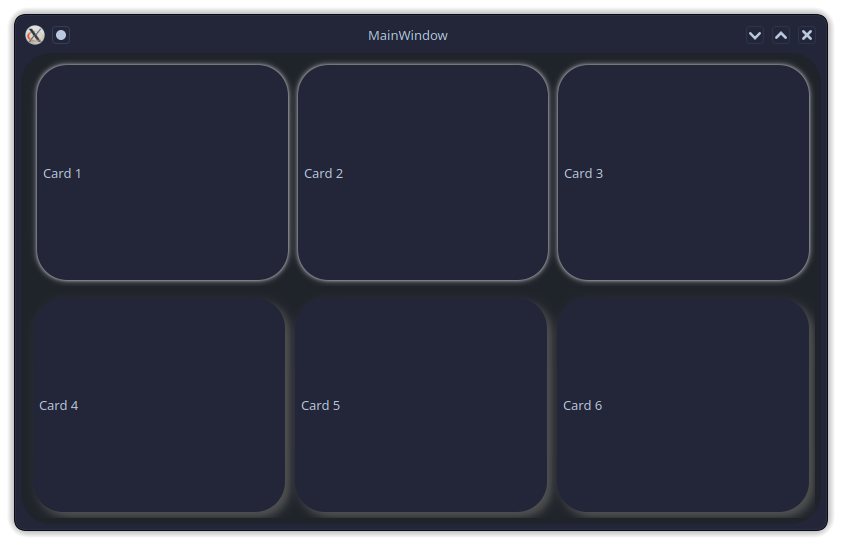
The QT-PyQt-PySide-Custom-Widgets provides you with a simpler option to create “card” widgets. QCard is simply a group of widdgets that you can apply a uniform drop shadow effects to without having to apply the shadow to individual widgets. This is helpful especilly when creating a dashboard with several “card” widgets.
Download
Download an example.
Creating QCards
After designing your GUI, inside the root of your project folder, create the “style.json” file which will contain all the values that will customize your GUI.
Inside the “style.json” file create “QCard” main object:
{
	"QCard": [{
	}]
}
Pass the group of widgets(widget names) you want to apply the drop shadow graphic effect to:
{
	"QCard": [{
		"cards": [
			"card1",
			"card2",
			"card3",
			"card4"
		]
	}]
}
Pass the shadow values:
{
	"QCard": [{
		"cards": [
			"card1",
			"card2",
			"card3",
			"card4"
		],
		"shadow":[
			{
				"color": "#000",
				"blurRadius": 5,
				"xOffset": 0,
				"yOffset": 0
			}
		]
	}]
}
Yo can have as many QCard groups as you want:
{
	"QCard": [
		{
			"cards": [
				"card1",
				"card2",
				"card3",
				"card4"
			],
			"shadow":[
				{
					"color": "#000",
					"blurRadius": 5,
					"xOffset": 0,
					"yOffset": 0
				}
			]
		},
		{
		"cards": [
			"card5",
			"card6",
			"card7",
			"card8"
		],
		"shadow":[
			{
				"color": "#555",
				"blurRadius": 20,
				"xOffset": 0,
				"yOffset": 0
			}
		]
	}
	]
}
Download
Download an example.
More
Watch the full video tutorial here https://youtu.be/44IbJnTiKRg